
*disclaimer: our two web devs Angus and Liv wrote this blog post so excuse them if they get too techy. If something doesn't make sense, Google is your friend and if after that you still don't understand it, don't worry, they are just talking nonsense*
How does one robot? That is the first question we asked ourselves when we began developing roboTOP. Our answer may surprise you, mostly because it is probably a truly insane approach to take! Let us take you through how we got to where we are now… and because we know the most engaging blog structure is a list… well….
5 Questions you need to ask yourself when building a robot for Pi Wars (you won’t believe number 2!)
1. What does the robot need to be able to do?
Well, move around of course, but also shoot projectiles for the Duck Shoot, detect the colours and positions of balls in the Rainbow challenge, centre itself through the chicanes of the Straight-Line challenge and navigate the awkward turns of the mockingly titled ‘Minimal Maze’.
To do this we decided we need at the very least:
- a remote control system (except wifi is unreliable, bluetooth sucks, radio is dead)
- a front-facing camera for computer vision processing
- distance sensors on the sides of the robot for detection of the surrounding walls
- an accelerometer/magnetometer to measure out accurate turning maneuvers
- a programmatically controllable projectile launcher
We also thought that in an ideal world we would have:
- lots of cameras so we don’t have to turn to look at things
- lots of distance sensors so we don’t bump into things
- lots of interfaces for communication through busy airwaves
- lots of bells and whistles for fun and points ;)
Of course the most important out of all of these requirements is the bells and whistles. Also, we probably won’t be using the magnetometer because we can’t seem to get accurate headings out of it.
2. How big does the robot need to be?
As big as possible of course. We had to fit within certain size constraints for the PiWars competition, but that didn’t stop us pushing the size constraints to the limit. Go big or go home.
3. How should we program the robot?
Python. But we went for Node.js.
Seriously though, we really did decide on (mostly) Node and not just because we use it everyday. In fact there were so many reasons we’re going to need another list:
10 reasons to use Node.js over Python for your PiWars robot (Python devs don’t want you to see this!)
- Asynchronous, event-driven I/O. This is a great programming paradigm for a robot interacting with the real world, making it simple to handle multiple tasks and unpredictable delays and events. We can be pacing out a turn, waiting on a response from the distance sensors and streaming video to all our fans without forgetting to wink our lights on demand. And yes, this has been enabled in Python’s asyncio module now so lets move on.
- Uh, npm. One weird trick to not deal with python dependencies.
- Node also supports concurrency which is great for doing compute intensive tasks like computer vision without lagging everything else out. This is handled with child processes which means we can actually just spin up Python for these bits (and still get access to all of the awesome Raspberry Pi community Python libraries).
- Maybe 10 was ambitious…
- I guess we actually kind of like JavaScript.
So now that we’ve convinced you that Node.js is definitely the best choice it’s time to justify what we had to do to make sense of our uncontrollable ambition to run a robot like a high-availability web server.
One of the first considerations we had was how to interact with our robot’s hardware. It was important to ensure that the app was not dependent on every piece of hardware being connected and functional. For example, if we wanted to remove some hardware to free up GPIO pins or if a sensor breaks on the day of the competition we didn’t want to have to get mucky over ssh. To accomplish this we developed a modular I/O system, keeping each bit of hardware isolated from the others. “Wait, that’s silly, if each type of hardware is isolated from one another doesn’t that mean your remote control doesn’t know anything about your motors?” I hear you cry. Well anonymous internet user, you are totally correct, the gamepad indeed doesn’t have control of the motors directly, which leads us to our next architecture decision.
We decided that we need a top level class to instantiate and control all the active modules at once. We shall call him Squishy and he shall be our… oops sorry we meant roboTOP, he shall be our roboTOP. roboTOP interacts with modules in the following ways: It can invoke the module methods directly (such as setting the motor power), or if the module has some passive capabilities it can subscribe to module emitted events (such listening for a gamepad button presses). Because roboTOP can directly control all the active modules it can do things such as listen to the ‘FORWARD’ event emitted by the gamepad and in response move the robot forwards by calling ‘motors.setPower({ left: 100, right: 100 })’. Actions that require more than one I/O module we have dubbed ‘manoeuvres’ and are all controlled by roboTOP. That’s pretty much the gist but if you still have questions regarding our software you should look out for it on our Github after the competition.

4.(we’re doing a list, remember) How much effort should we put into completely pointless awesome bells and whistles?
Like, a lot. It should have LEDs all over and the switches must require keys. It should be CNC’d out of titanium, feather-light and look like a pi-top. It will have the sliding keyboard but miniaturised and motorised with a range of attachments. We probably need to those wheels that go sideways. UIs to control, diagnose and tweak everything and never have to be reprogrammed or reset. Stream processed video from all angles and be a tweeting photo-booth. It should have a face to express its feelings and sound effects and dancing. Its golf club must have great swing and it’s rockets laser guidance.
roboFACE:
[wpvideo TmBCFPJM]
5. Is all this going to work?
No! Well at least, not at first. After throwing together most of the code, a bit of tangled wiring and (literally) burning through a few Pis we got it all together and *weh-weh*. Sensors randomly fail, the Pi keeps resetting - probably a power supply issue. We were using our motor driver board to power the Pi, sensors and whatever else as well as the motors and it was a little more than it could handle. So we decided to make use of the pi-topHUB to separately power essentials like the Pi because it can also do 18-5V regulation and the way it bonds with the Pi and provides cooling is awesome. In the circuit diagram below the red boxes indicated the two isolated 5V systems.
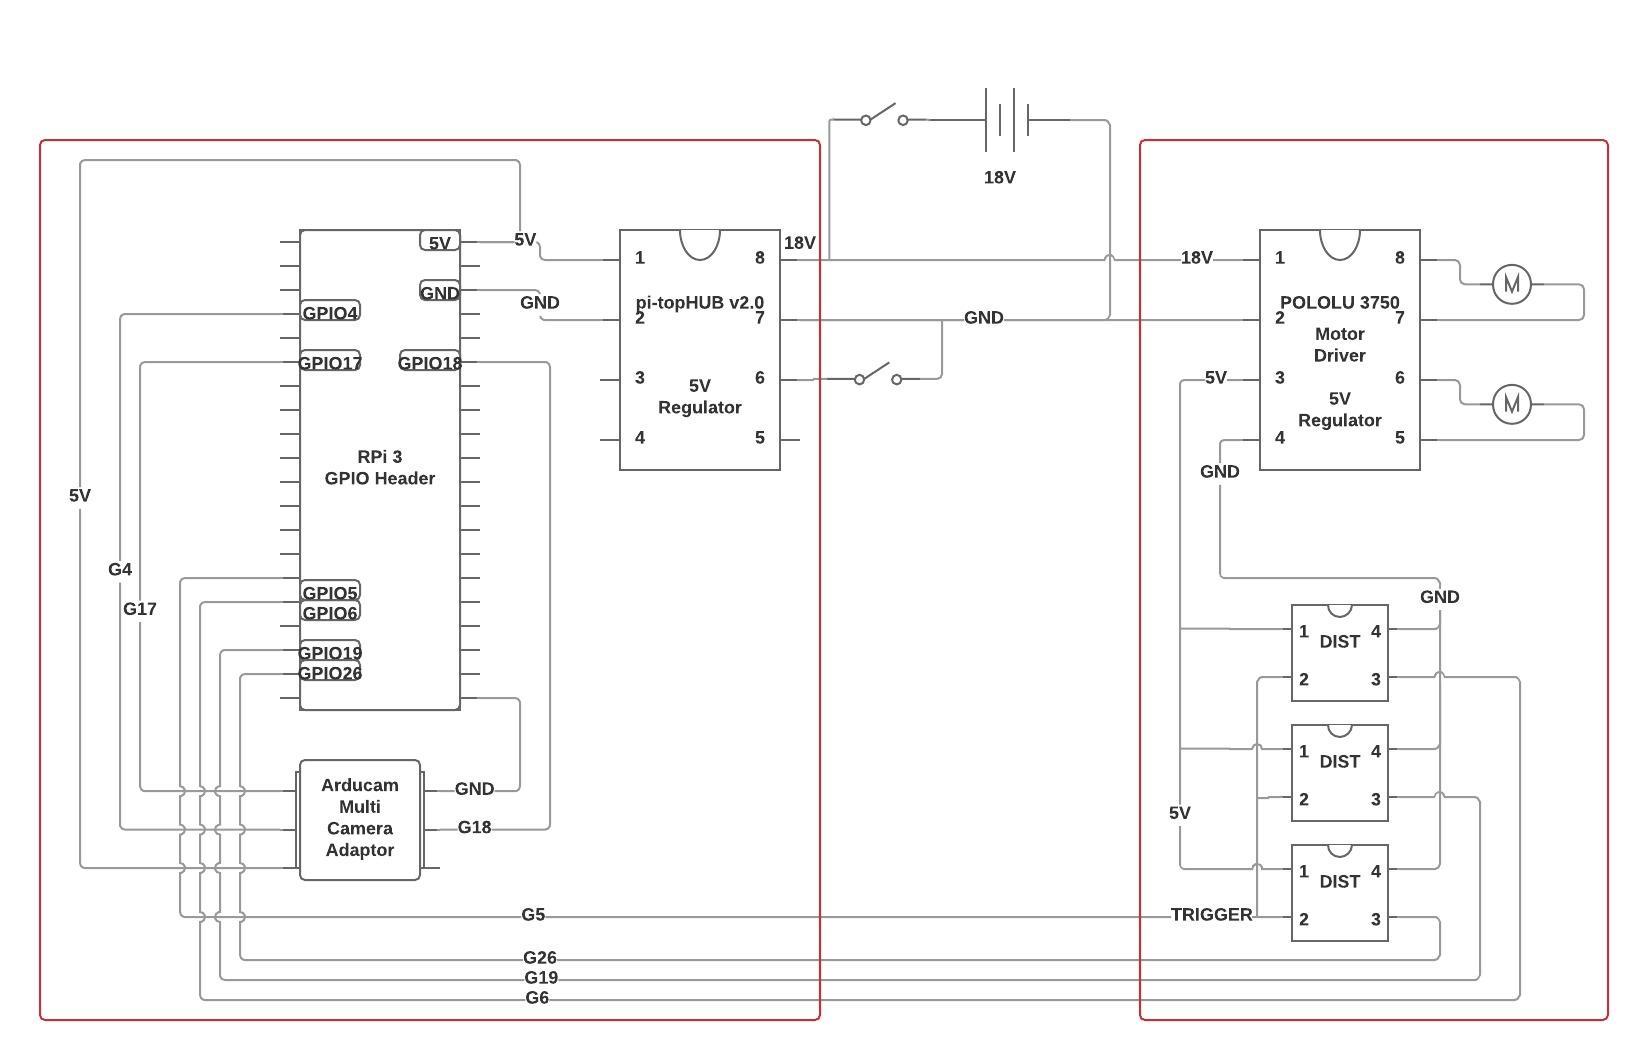
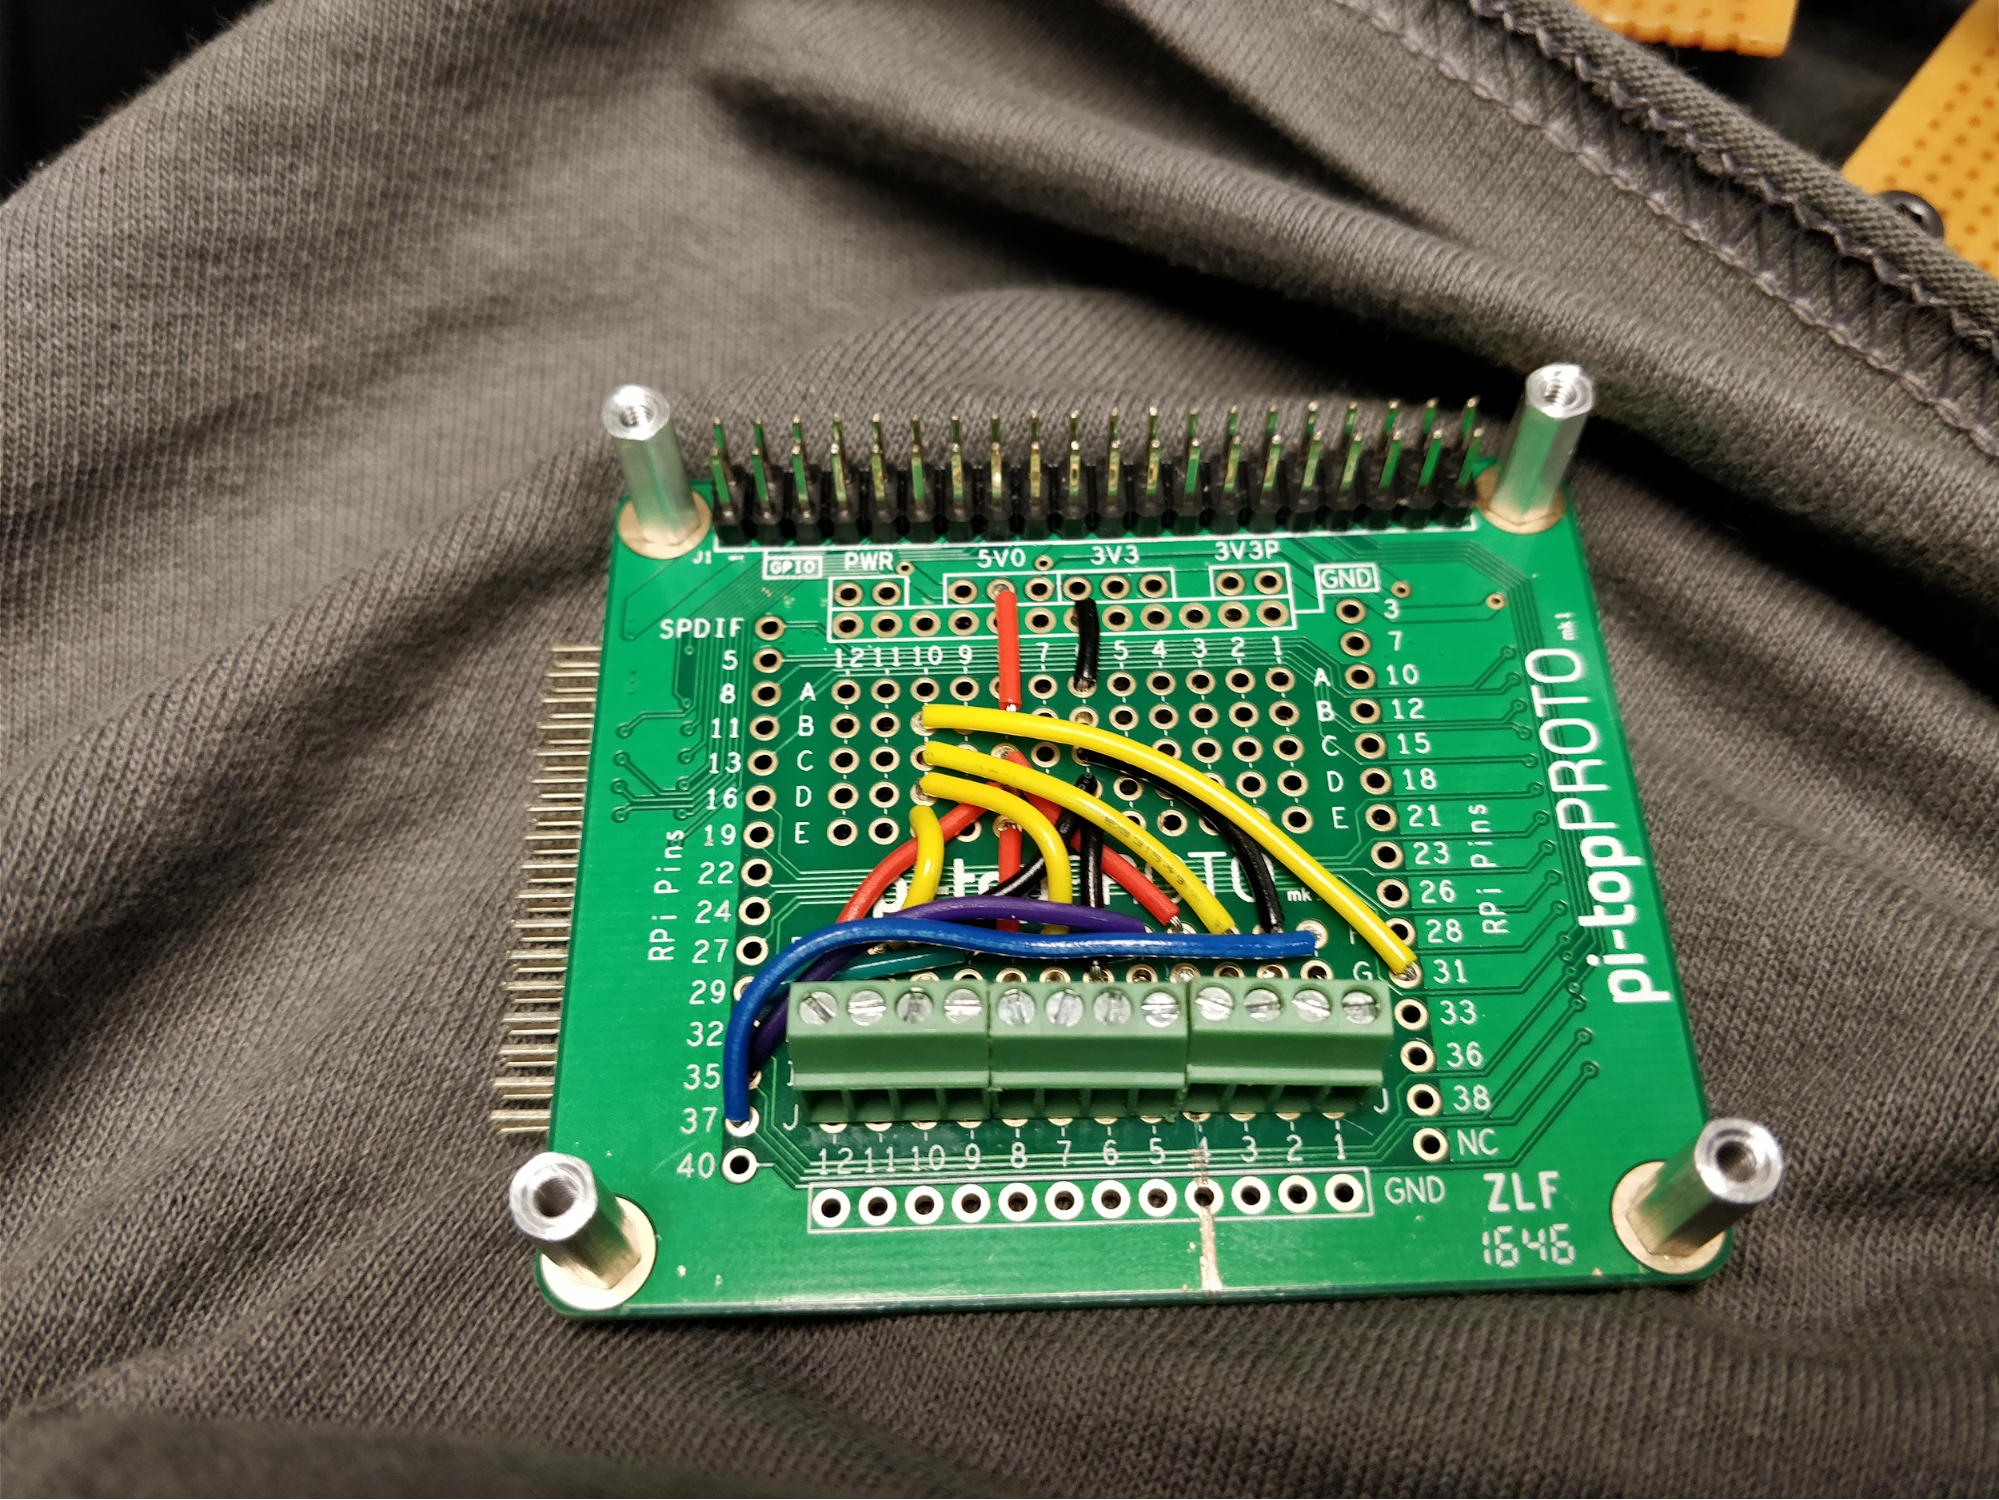
Here is the wiring for our distance sensors (DIST in the diagram) which is neatly inlined below the motor HAT. You can see they share the yellow TRIGGER wire on GPIO5 (pin 31) and get 5V from the HAT above. A pin was removed from the pi-topPROTO header on the left to isolate the 5V rails.
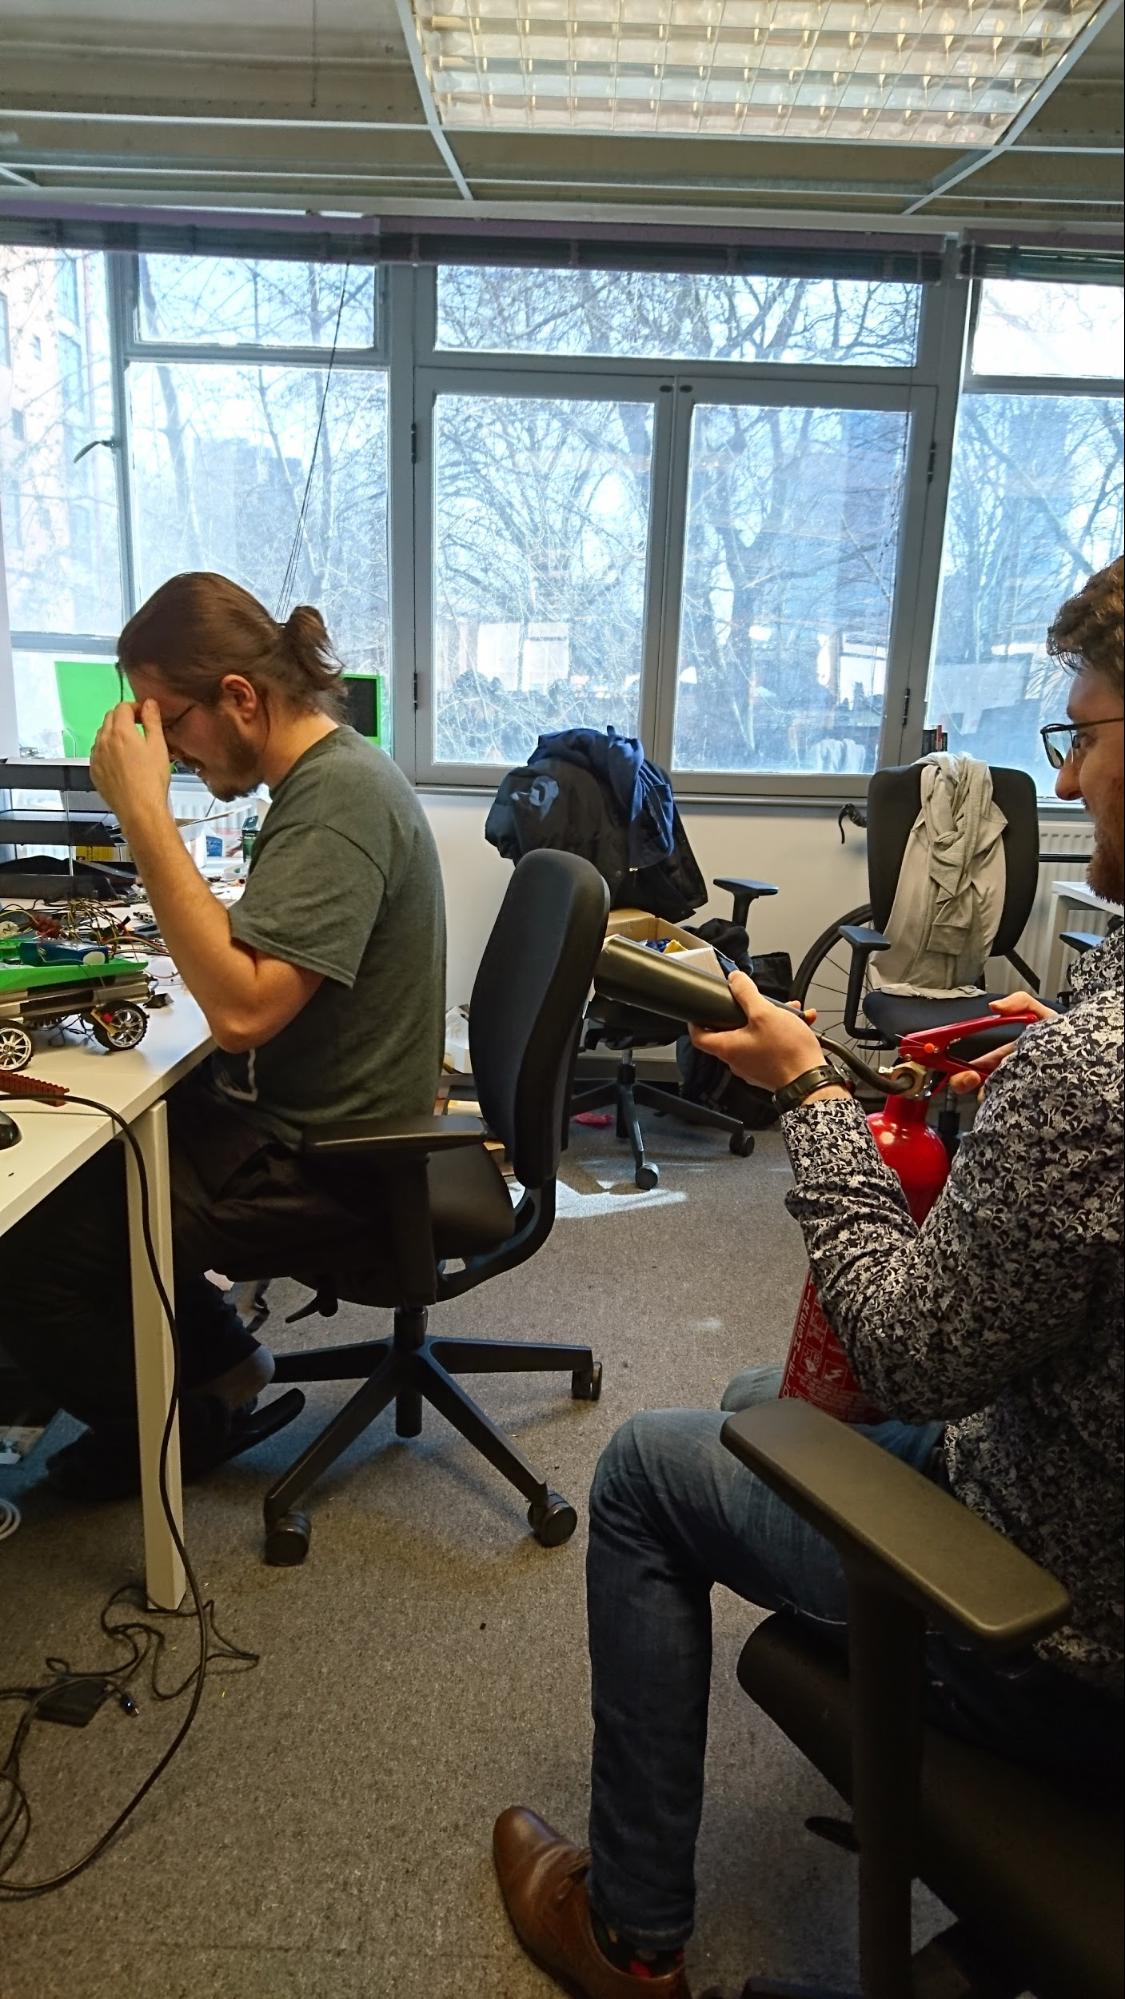 Angus testing our robot and Matt prepared for the inevitable
After getting all this circuitry worked out the hardware started to work and we had the basics of our robot up and running. The priority now was finalising the bells and whistles but also there was the little issue of the autonomous challenges which will be the subject of our next post.